Table of Contents
Adding locations using + Projects menu page.
After creating a ForneyVault project, you can add one or more locations to that project following these steps:
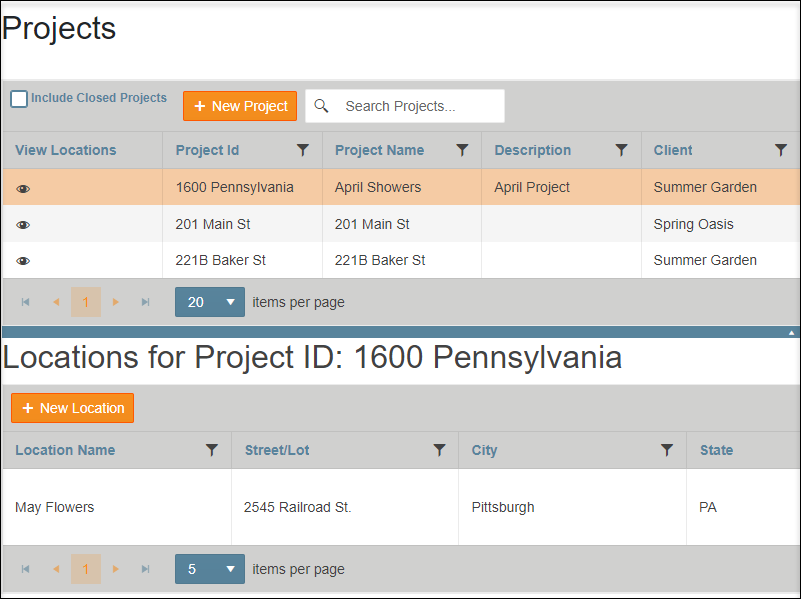
- After logging into ForneyTools, click the Projects link on the left navigation menu.
- From your list of Projects, click on the project needed to add its location.
- Select the filter (
 ) option to search for a created project, you can type a few characters of the project number you're trying to find, and the search will reduce the list, returning any projects that contain those characters.
- Select the filter (
- Click the View Locations (
 )button to select it.
 - Under the Locations for the Project you choose, select the + New Location button.
- Enter a name for your new location and any other information you would like to add, such as Street, City, State, and Zip.
- Notice that this location is assigned to the project that you selected previously.
- If you need to edit your location, click the item in the Location entry you wish to edit.
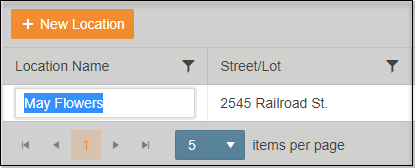
- To save changes click away from the field you changed.
- To discard changes select the Cancel Edit (
 )button to the right of the entry.
- If you need to delete a location, click the Location entry and select the Delete (
 ) button link to the right of the location entry.
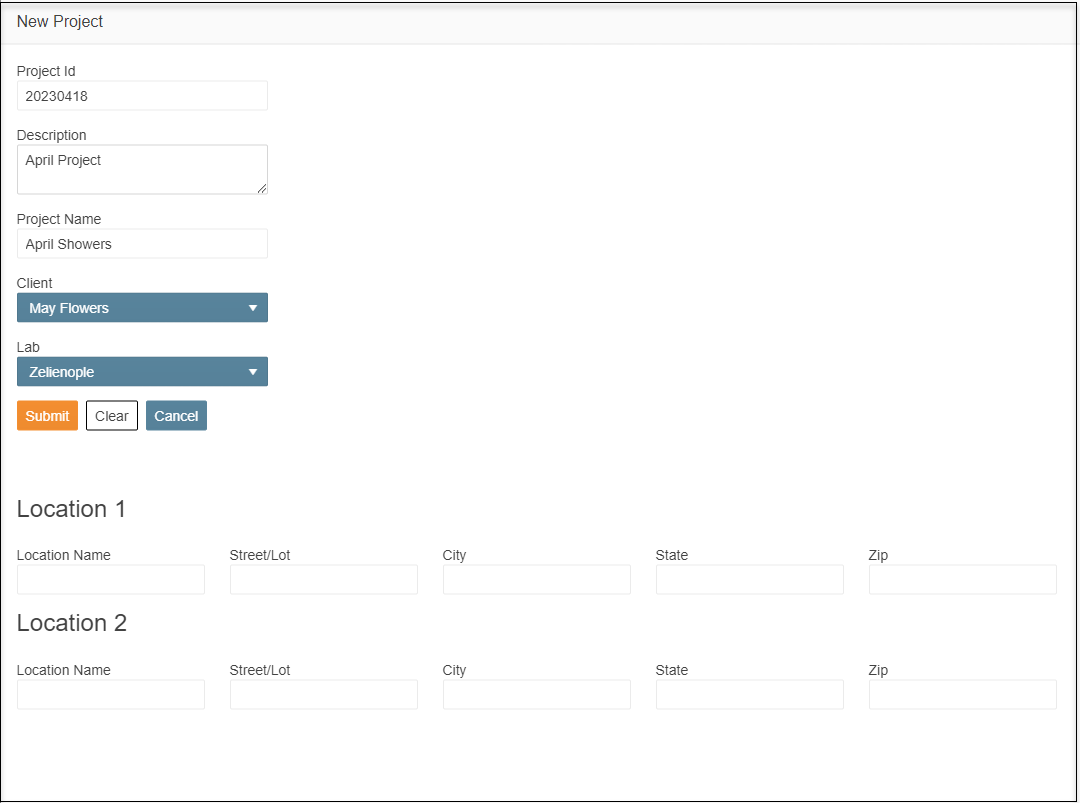
Adding locations when creating a new project.
- After logging into ForneyTools, click the Projects link on the left navigation menu.
- Select the + New Project button to create a new project.
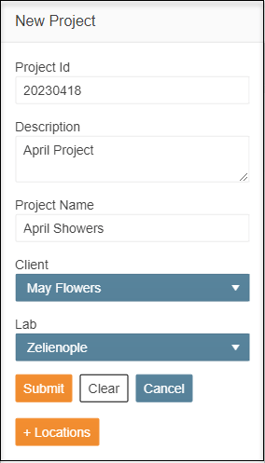
- After completing the project information select + Locations to complete the new location's information.
- Select Submit to save the new project with the new location information.