Just like the oil in your car, the hydraulic oil in your compression machine should be changed periodically. Over time, the oil breaks down and the moving parts of the system wear. Eventually, this leads to debris circulating in the oil. Regular oil changes combined with a wipe down of the inside of the reservoir minimizes the amount of debris in the system and extends the life of all of the components.
Occasionally, however, a relatively large piece of debris circulates through the system and makes its way to the main hydraulic dump valve, blocking it open slightly. This is most common of retrofit systems where the oil and debris in the old system are combined with a brand new Forney Retropak.
If you press Start Test on your VFD Automatic machine, the pump starts to run and build load, but then "flatlines" at some small load with the pump running at full speed, there's a good chance you have debris blocking your dump valve. Here's what to do:
- Confirm that debris in the dump valve is the culprit.
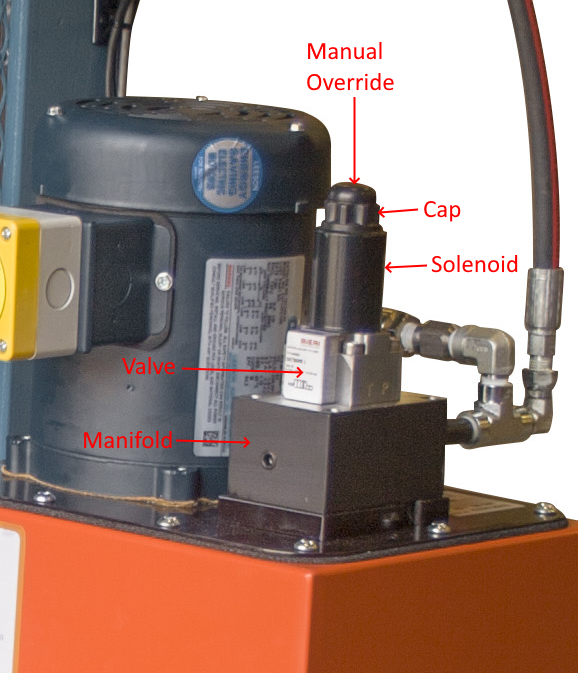
- The dump valve has a manual override feature that allows you to engage the dump valve manually by pressing on the valve cap, as shown in this photo:
- Prepare a specimen for testing and place it in the machine.
- Start the test as you normally would.
- When the load stops advancing and the motor achieves maximum speed, take note of the load achieved.
- Using your thumb or the palm of your hand, press down on the top of the cap to engage the manual override.
 CAUTION! The solenoid can become very hot during normal machine operation. Do not touch the solenoid while pressing on the manual override.
 -
Observe the load display while pressing and releasing the manual override. If the load increases slightly while pressing on the override and drops slightly when releasing the override, the dump valve is probably blocked open slightly.
- The dump valve has a manual override feature that allows you to engage the dump valve manually by pressing on the valve cap, as shown in this photo:
- After confirming that the dump valve is slightly blocked open by debris, you can follow these steps to remove and clean the valve.
- Stop a running test and wait for the hydraulic piston to fully retract.
- Shut down the HMI by toggling the power switch at the bottom of the HMI. Give it a few seconds to completely shut down.
- Unplug the machine from its power source.
- Note the location of the solenoid plug. The unit should be reassembled with it in the same position. Take a photo if necessary.
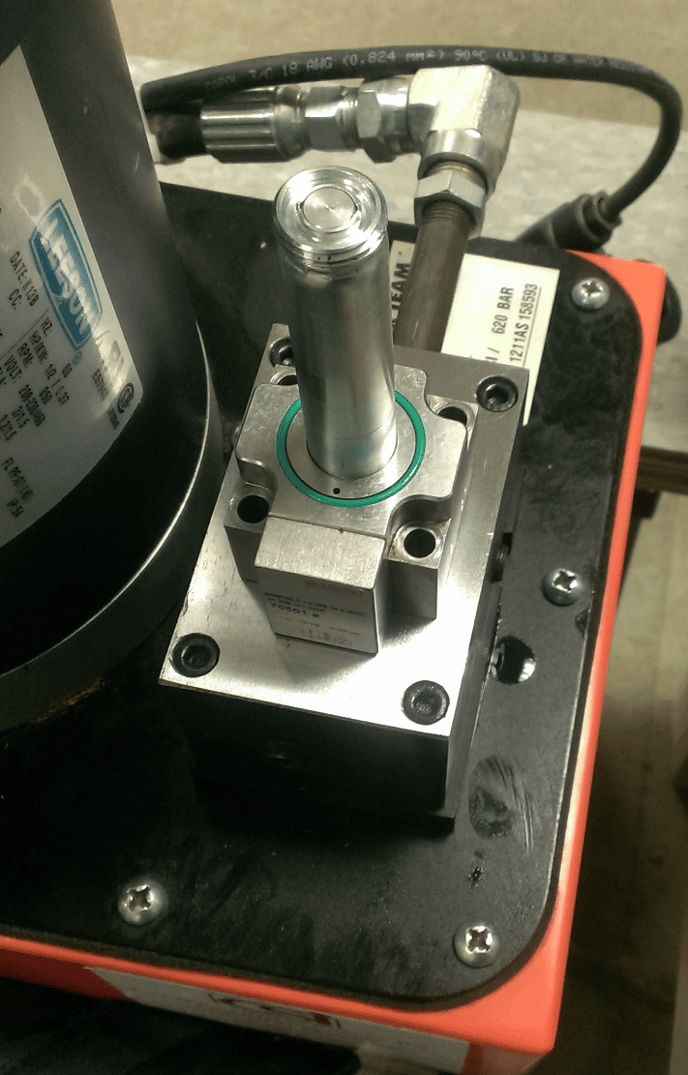
- Remove the cap (see photo above) and the O-ring below it and set both aside.
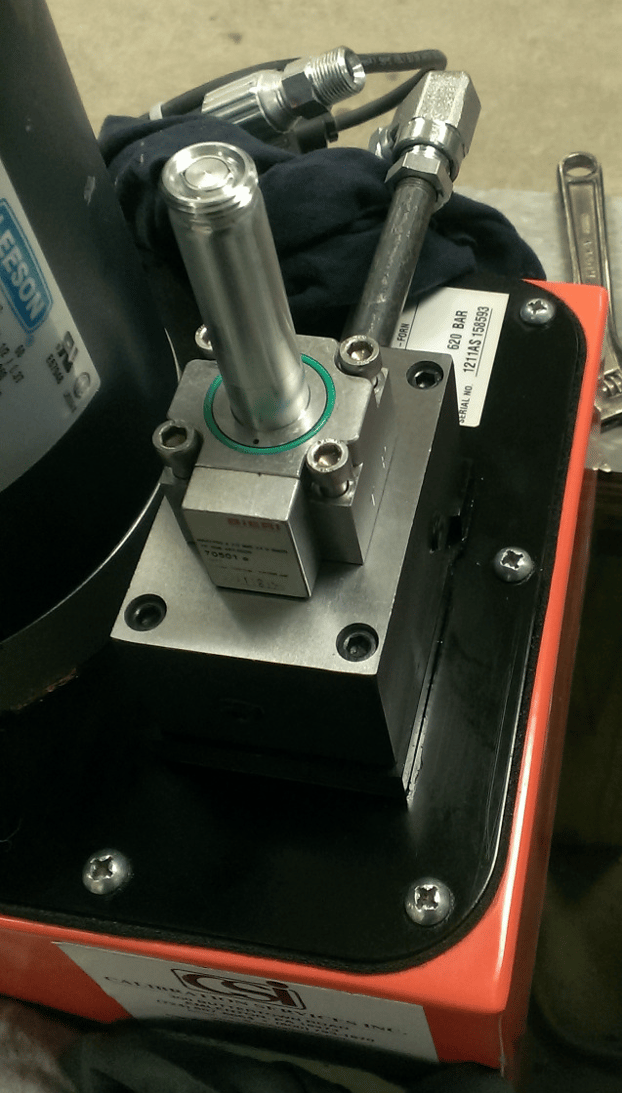
- Remove the solenoid by sliding it upwards off the valve and set aside. Please note the orientation of the valve. It must be reinstalled in the exact same orientation. The easiest way is to reference the side that has the name, diagram, and model number. We recommend taking a photo to ensure the position is not forgotten. This is what it will look like with the solenoid removed:
- The valve is removed by removing the four 5mm Allen bolts. A 5mm Allen wrench is required. Here's what it looks like with the bolts removed:
- Remove the valve and look at the underside. Use caution not to lose or damage the three O-rings seated in the underside of the valve.
- Now, using an air compressor (80 - 90psi recommended), blow air through the two larger ports on the underside of the valve (one at a time). The idea is to free any debris that may be preventing the valve from closing fully. It sometimes helps to hold a rag over one of the large holes and use the compressed air in the other.
- Once both large ports have been flushed with air a few times. Reinstall the valve making sure you use the same position it was in originally so the ports line up properly. Use the photo taken earlier.
- Tighten the 5mm Allen bolts in a star pattern.
- Reinstall the solenoid and cap. Make sure not to over-tighten the cap. It should
be a little less than hand-tight. - Plug in and test the system.
If this doesn't fix the issue, or if you have any questions, please contact Forney Technical Support:
- https://forneyonline.com/customer-service/
- Phone: 724-346-7400
- Toll-Free: 800-367-6397