Smart Alerts Help Guide: Table of Contents
1 Overview
2 Alert Types and Application
3 How to Access Alerts in ForneyTools
4 Steps to Get Started with Alerts
5 Manage Alert Recipients
6 Setup Notification Distribution Groups
7 Configure Alerts Using Standard Alert Types
8 Using the Alert Dashboard
9 Email and SMS Text Notification Messages
1 Overview
ForneyVault Smart Alerts provide testing labs with a path to CMT visibility in today's complex and distributed construction project landscape. With automated and actionable SMS and Email Alerts, test labs are prepared to efficiently respond to test results and deliver timely strength reports that keep projects moving forward.
ForneyTools includes a fully automated, cloud-based test monitoring and alerting solution for CMT professionals. Gain testing insights in near real-time, seamlessly collaborate and elevate test results and status visibility. Smart Alerts let you stay on top of testing issues and materials non-compliance for effective schedule management. They empower you to manage the test process and provide the metrics to drive future process improvements.
Configuring pre-defined alerts for your projects is effortless with the ForneyTools Alert manager. Choose the project, alert type and parameters, notification message type, and recipients, and you're up and operational. Once alert notifications are flowing, stay organized with the ForneyTools Alert Dashboard, where you can review and manage your triggered alert notifications.
Replacing error-prone manual processes with automated Alerts will benefit you in 5 ways:
- Enhance resource utilization
- Allow your team to scale
- Reduce cost
- Improve test process reliability and response time
- Produce valuable process metrics
2 Alert Types and Application
ForneyTools supports seven alert types to help you stay on top of progress and issues.
|
Alert Type |
How it Works |
Benefit |
|
Test Due |
Like a calendar reminder, the test due notifies you when a test is due to complete in the specified coming days/hours. |
Complete early breaks in time to report results to the job site. |
|
Test Overdue |
Test overdue notifies you when a test is not completed within the specified due dates/time. |
Quickly Address test tasks that the team inadvertently missed. Remain compliant with ASTM testing windows. |
|
Completed Set |
The completed set notifies you when your a set of the configured age has been tested. |
Stay on track with test result review and reporting. |
|
Early Break Set |
Early break notifications can be used for road opening, mold stripping, or form removal. |
Effectively manage time-sensitive tasks for your project. |
|
Low Break Set |
The low break will notify you when the average strength of the tested specimens is below the material's expected strength. |
Avoid material and project compliance risks. |
|
Outlier Specimen |
Outlier will notify you when the strength of one of specimen in a set is some percentage outside the average of that set. Even if the strength is acceptable, the alert will inform if a specimen in the set is out of range. |
Avoid material and project compliance risks. Identify potential mishandling of specimens. |
|
Report Workflow |
Report workflow notifications let you know when someone has submitted a strength report for your approval or if a report that you submitted was rejected. |
Efficiently collaborate and manage reporting workflow. Proactively address issues that surfaced in reports and remain on schedule. |
3 How to Access Alerts in ForneyTools
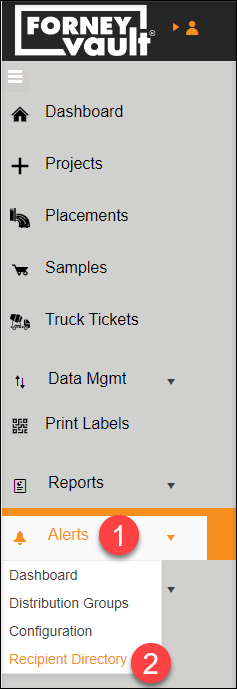
Once enrolled in Smart Alerts, you will see a new Alerts menu item in the main navigation menu.
To begin the alert setup process for the first time, choose the Alerts menu and select Recipient Directory.
ForneyTools user logins may be configured with Alert/None access, Alert/View access, or Alert/Create access.
To request permission changes for the Alerts feature, please contact your company's ForneyVault user administrator or contact Forney support.
User Roles
| Alert Role | Recipients |
Distribution Groups |
Alert Configurations |
Alert Dashboard |
Notification Email, SMS Text |
| None | Alerts is not displayed in the menu | ||||
| View |
|
|
|
Manage notifications | View, delete messages |
| Create | Add, update, delete | Add, update, delete | Add, update, enable, disable | Manage notifications | View, delete messages |
4 Steps to Get Started with Alerts
If configuring Alerts, please request admin access from your company's ForneyVault user administrator or contact Forney support.
Once you have the proper Alert role, getting started with alerts can be done in five easy steps:
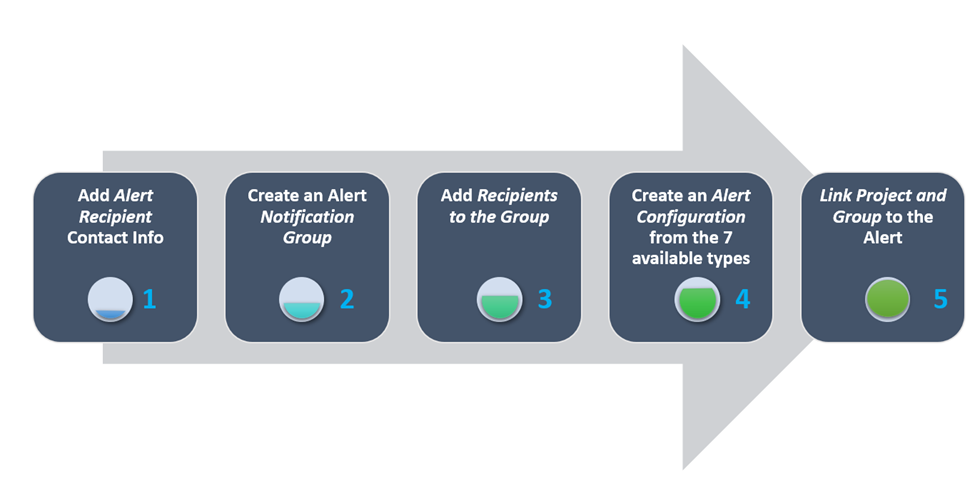
The first step is adding your alert recipient names and contact info for email and/or SMS text messages. Recipients must have a ForneyVault user login.
After configuring your recipients, you can then create a distribution group. Recipients must be assigned to a group. Distribution groups are similar to email distribution groups. You may have multiple groups if your recipient members vary.
After creating distribution groups, you are ready to configure your alert. When creating your alert configuration, choose from the seven alert types, set the required parameters, and then associate that alert configuration to your ForneyTools project and alert distribution group.
Note:
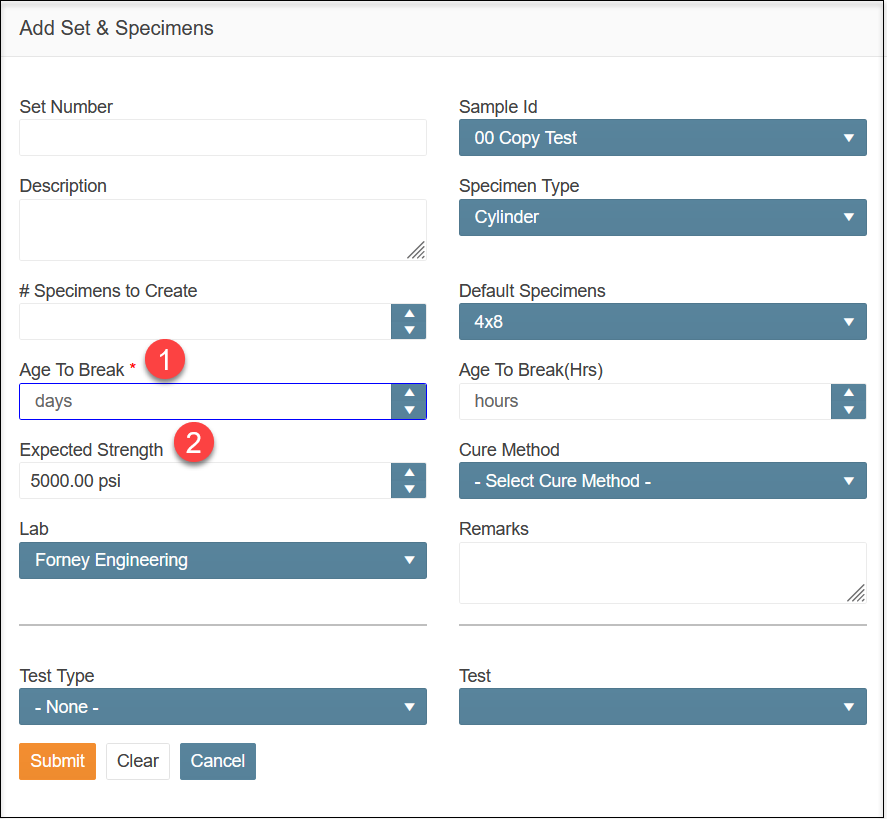
Alerts related to specimen strength and age to complete due dates require that you populate this data in ForneyTools. Please be sure that your sets include Age to Break and Expected Strength values, as seen below:
Caution:
If you plan to configure alert recipients to receive an email, please ensure your mail server does not block the ForneyTools sender domain, @forneyonline.com.
5 Manage Alert Recipients
Alert recipients must be defined in ForneyTools. Recipients may be chosen from your organization's ForneyVault user login set. ForneyVault will support external/non-ForneyVault user recipients in a future release.
Creating Alert Recipients
- Navigate to Alerts->Recipient Directory.
- Select the +Create Recipient button at the top of the Alert Management
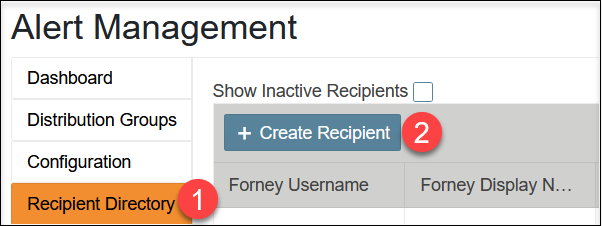
- Click Select Forney User.
- Note: The feature to add external users is currently disabled but will be available in a future release of ForneyTools.
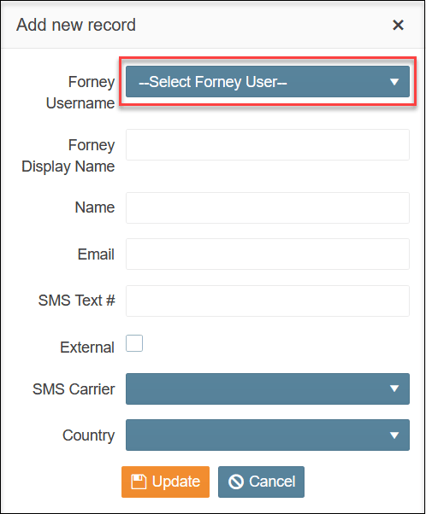
- Choose a name from the --Select Forney User-- drop-down list.
- Enter the person's name, email, mobile number, mobile/SMS carrier, and mobile country.
- Note: A phone number and email may only be used once. You cannot create multiple phone numbers or emails for a single recipient.
- Note: You can add only an email address, only a mobile number, or both. This determines if the recipient receives only email notifications, only SMS notifications, or both, respectively.
- Select the Save button when you are done.
- New recipients are Active by default. This means that the person can receive notification messages.
- Recipient entries cannot be deleted, but they can be set to inactive.
View and Edit Recipient Details
- Added recipients can be viewed in the Recipient Directory.
- To view, edit, or deactivate a recipient, select the edit button (
 ) to the right of your desired record.
 - Edit the information as needed and select the Update button to save or Cancel to go back to the recipient directory without saving.
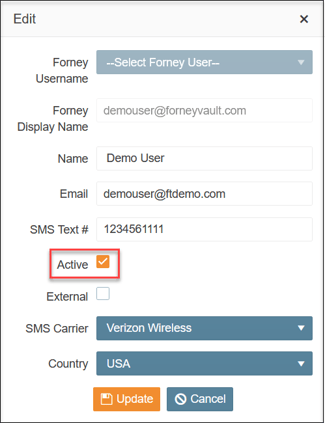
- You may deactivate/disable a recipient so that the person does not receive alert notifications. To do so, uncheck the Active box at the bottom of the Edit Recipient box and select Save.
Note:
Recipients may not be deleted from your directory, as they might be linked to alert notifications that have been generated. ForneyVault preserves Recipient information for audit purposes. If you do not want to view inactive recipients in your direction, uncheck the option for Show Inactive Recipients (default setting).
6 Setup Notification Distribution Groups
Distribution groups work similarly to email distribution groups. Alert recipients must be added to a group to receive notifications. Groups are then associated with Alert configuration entries.
A user may be affiliated with multiple labs. Since Alert configurations are specific to one lab, users affiliated with numerous labs must be added to distinct Distribution Groups for each lab.
View Groups
- Navigate to Alerts->Distribution Groups.
- Available groups appear in the Group list.
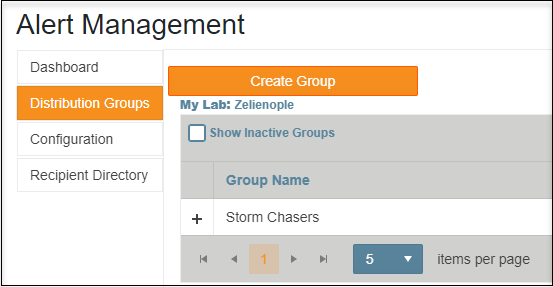
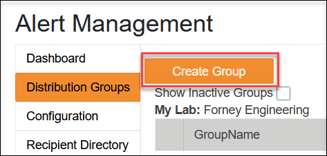
Create a New Group
- Select the Create Group button at the top of the Alerts Management Page.
- A new row will appear in the group list with a default "New Group" name in the name field.
- Select the name field to assign a unique name to your new group.

Add a Group Member
- After editing the group name, you can add members to your newly created distribution group by selecting the Add Member button.

- The Add Recipients dialog box will open.
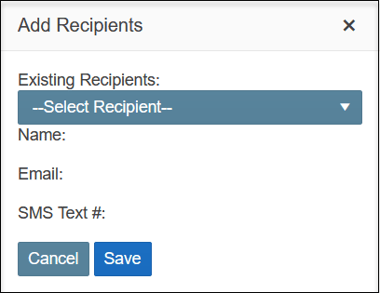
- Choose a person from the Existing Recipients who were previously added to the Recipient Directory.
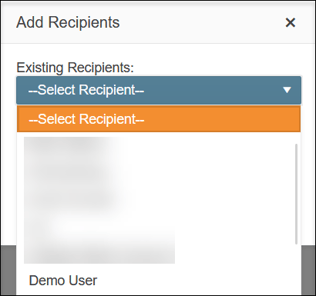 .
.
- After you select a recipient, their contact info will be displayed.
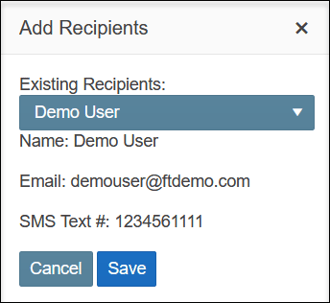
- Select Save to add the entry to the distribution group or Cancel to go back to the Group list.
- After you save a new member to the group, select + to expand the distribution group's members view.

Remove a Group Member
- Select + to expand the desired distribution group's members' view.
- Select the Remove (
 )button to remove that specific recipient from the group.
Copy Group
- Select the Copy Group button.

- A new Group entry will be added to the Distribution Group list with the same group name being copied with "- Copy" added to the end of the group name. You can edit this name by clicking on the name the same as when you create a new group.

Delete Group for Unused Groups
- Delete Group applies to unused groups. Once alert notifications have been sent to a group, the group cannot be deleted for audit purposes. The Delete Group button will not be available if that is the case.
- Select the Delete Group button at the bottom of the Group's member list.

- Once the group is deleted, it CAN NOT be restored.
7 Configuring Alerts For Your Default Lab
This section describes how to configure the seven alert types. If needed, you may create multiple alerts of the same type for a given project.
View Configurations
- Select Configuration from the Alert Management page.
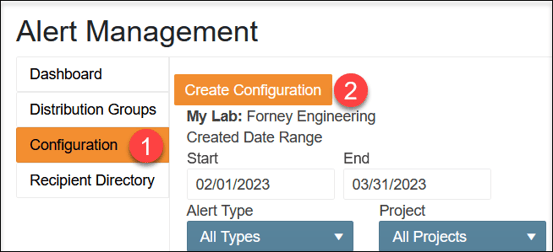
- Previously created alerts will be displayed in the alert Configurations table. You can filter alert configurations by Created Date Range, Alert Type, Project, Only My Alerts, and Hide Inactive Configurations.
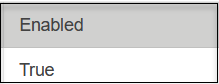
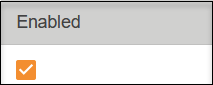
Enable/Disable Alerts
Newly created alerts are enabled by default. Select the Enabled checkbox in that alert configuration's row to disable or re-enable an alert.
Create Configuration
- ForneyVault Alerts supports seven types of alerts. Alerts may be applied to a single project or globally to all projects.
- A given project may have multiple alerts of the same type if different threshold parameters are set. ForneyTools will warn you if you inadvertently attempt to save a duplicate alert.
- When you launch Create Configuration, the following window will open. Choose your project name from the list and then select the alert type.
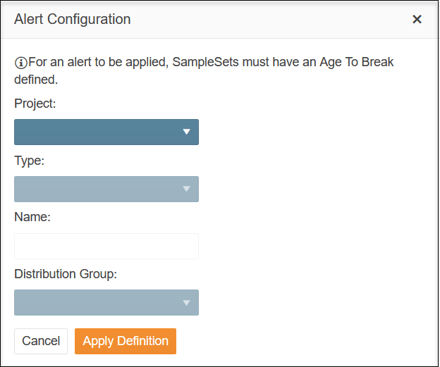
- The Global project type is available for all Alert types. Set your project to Global if you want to create an alert automatically applied across all of your lab's projects.
Overview of Alert Type Configurations
This section describes configuration requirements for each of the seven alert types.
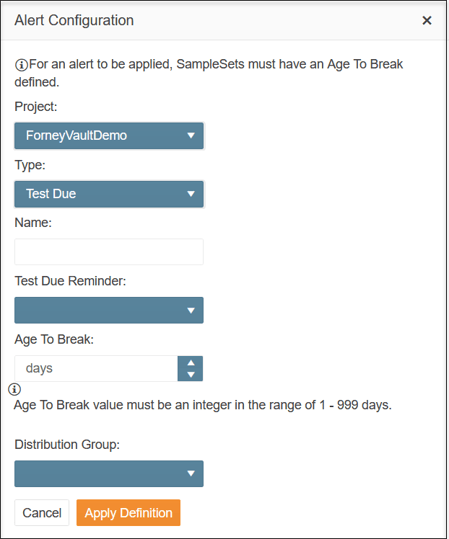
1. Test Due Configuration
Like a calendar reminder, Test Due alerts notify you when a test is due to be completed in the specified coming days/hours. This alert type enables you to stay on schedule and remain standards-compliant. Tests due can be applied to sets at any age. Test Due alerts can be configured to send notification reminders up to 24 hours before the due date. The actual "due" time is the break-age added to the sample date and time.
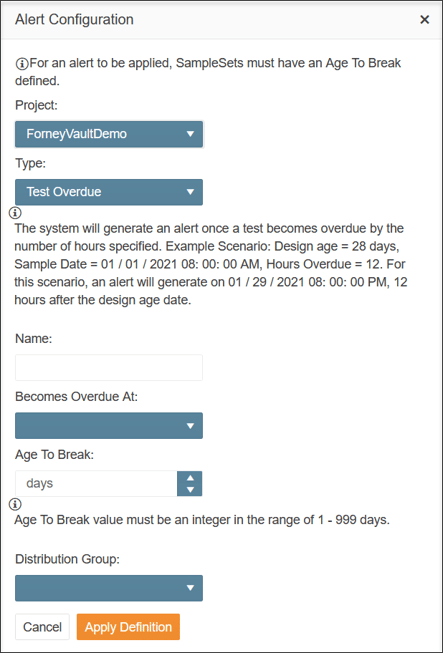
2. Test Overdue Configuration
Test overdue notifies you when a test is not completed within the specified due date/time. This alert enables you to address tests that the team inadvertently missed quickly. Test overdue applies to sets of any age. When defining overdue, you must specify the overdue threshold in the Becomes Overdue At field. ForneyVault will generate an alert when that appointed time has elapsed from the testing due date for that set. The actual "due" time is the break-age added to the sample date and time.
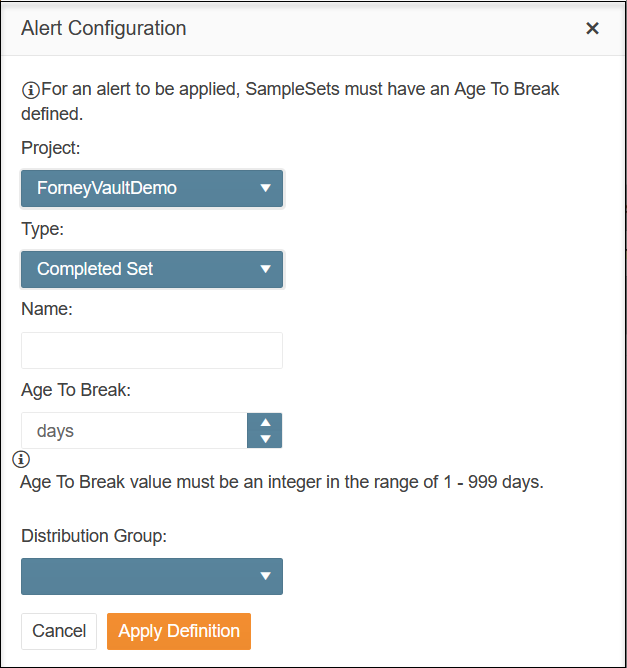
3. Completed Set Configuration
Completed Set notifies you when all specimens in your configured set have been tested. This alert type helps you to stay on track with test result review and reporting.
4. Early Break Set Configuration
Early break alerts can be used for road opening, part stripping, or form removal. This alert type can effectively manage time-sensitive tasks for your project. When defining an early break set configuration, you must indicate the % of Expected Strength for an early break. The Age to Break is configurable. For example, if the design age is 28 days, an early break test might be performed at 3 days.

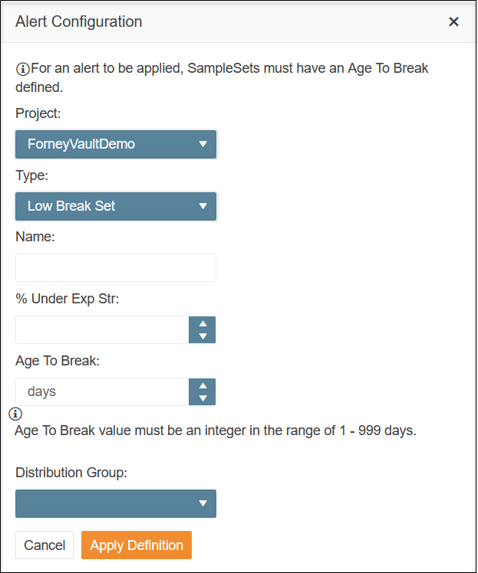
5. Low Break Set Configuration
Low Break Set alerts will inform you of tests where a material's strength is too low per your set specifications. These alerts can be used to avoid material and project compliance risks. This alert type applies to sets of any age. To configure a low break alert, specify the % Under Expected Strength for the set. ForneyVault will generate an alert if the average strength of the set falls below its expected strength by the defined %.
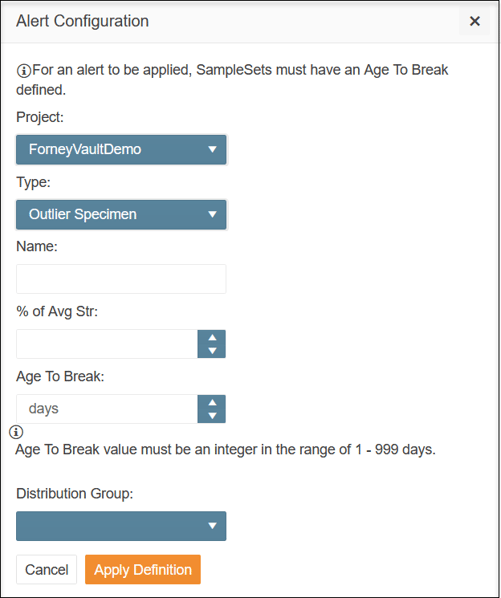
6. Outlier Specimen Configuration
Outlier alerts will notify you when the strength of one of the specimens in a set is some percentage outside the average of that set. Outlier alerts can be used to avoid material and project compliance risks. This type of alert applies to sets of any age. To configure an outlier alert, specify the % of Avg Str of the set. ForneyVault will generate an alert if one specimen's strength falls above or below your specified % of average strength.
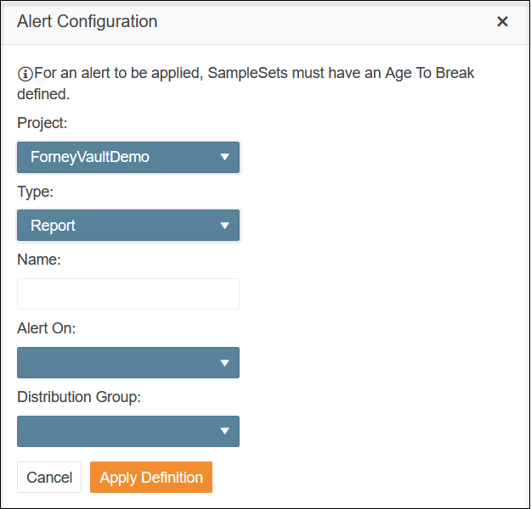
7. Report Alert Configuration
Report workflow alerts notify you when a ForneyVault User has submitted a strength report for your approval or if your submitted report was rejected. This alert type enables you to efficiently collaborate and manage reporting workflow, proactively address issues that surfaced in reports, and remain on schedule.
To configure a report alert, set Alert On to Submitted or Rejected.
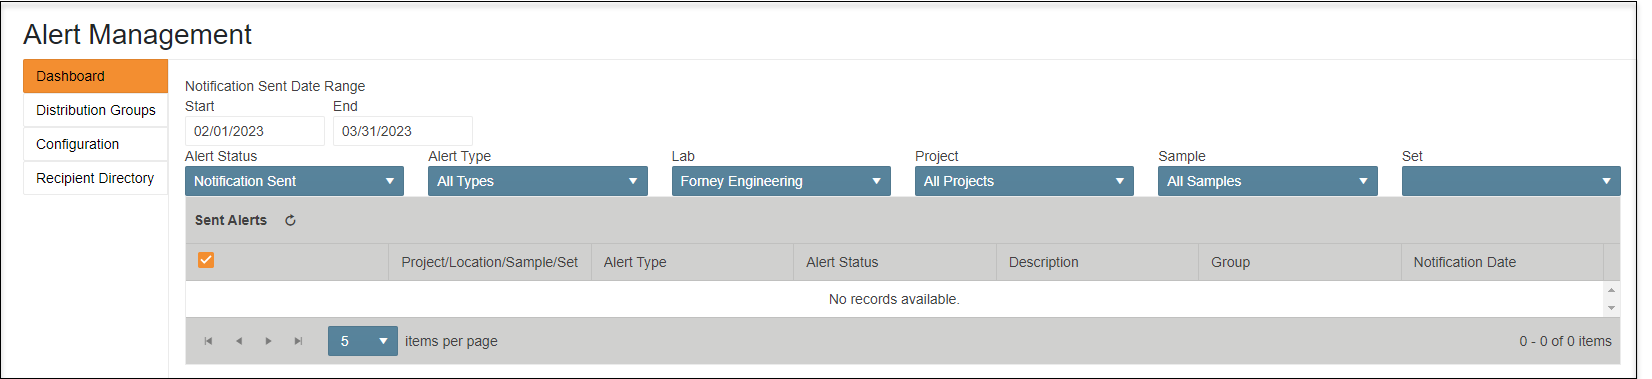
8. Using the Alert Dashboard
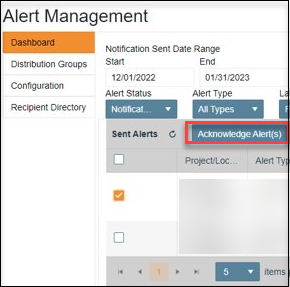
The Alert Dashboard displays alert notifications that have been generated for your projects. When using the Dashboard, you can select Alert Status to filter alerts by Pending, Notification Sent, and Acknowledged.
Pending alerts have been triggered by the system, but a notification message has not yet been sent to email or SMS text. Sent alerts have generated a notification message to the alert distribution group recipients. An alert notification becomes Acknowledged when a ForneyTools user manually sets the status in the Dashboard.
You can filter by alert type Date Range, Alert Type, Lab, Project, Sample, and Set. The Set filter requires that you also choose a Sample value.Filter settings are preserved between ForneyTools sessions. If you apply a specific end-date filter, you may need to adjust that later to ensure you always see notifications for the current day.
Using Refresh to Display the Latest Sent Alerts
Newly generated alert notifications will not automatically display on an open Dashboard screen. If you have the Dashboard open and want to check for new notifications periodically, click on the refresh (![]() ) icon in the Dashboard alerts table.
) icon in the Dashboard alerts table.
Alert Details
Select a record on the Dashboard table to view detailed information about the alert notification. The Notification Details will be displayed below the Dashboard table. The Notification Details also include a link to the test set associated with the notification. Selecting the set link opens details in a new browser tab. Report alert notification details include a View Report link to open the related PDF report.
Acknowledging Alerts
You can acknowledge an alert to remove it from the sent alerts view. This feature allows you to organize your notifications. Acknowledging alerts under your ForneyVault login will not change the alert status for a different ForneyVault User in your notification Distribution Group. Each user is responsible for managing their alerts.
Select the left-most checkbox in the alert notification's record to set the status to acknowledge. You may Select All at the top of the selection checkbox column or select individual alert notification records. Once the checkbox is selected, click on the Acknowledge Alert(s) button in the bottom-left of the Dashboard Alerts table. Acknowledging will automatically refresh the list. You can later view your acknowledged alerts by setting the Dashboard filter for Alert Status to Acknowledged.
9 Email and SMS Text Notification Messages
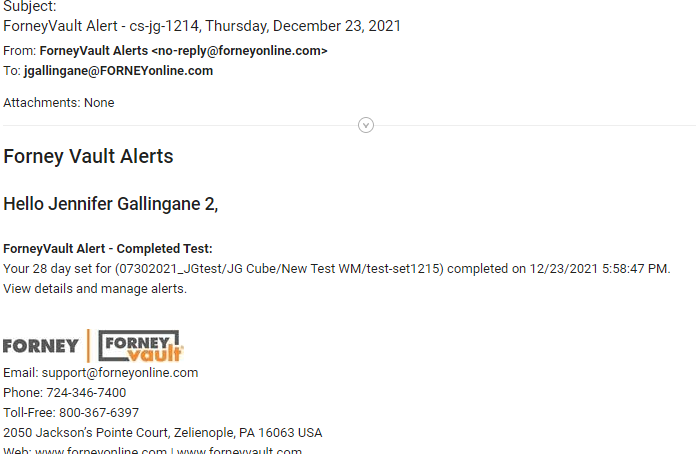
In addition to Alert Dashboard, Smart Alerts can send notifications to your email and/or phone via SMS text.
If you have configured recipients to receive an email, please ensure that your mail server does not block the ForneyVault sender domain, @forneyonline.com. Check your spam folder if you see alerts on the dashboard and text messages but not email.
The SMS text messages will come through your phone carrier's SMS gateway. If you are failing to receive text messages, please advise Forney support. The phone carrier gateway address may have changed, which would require intervention by the ForneyVault development team.
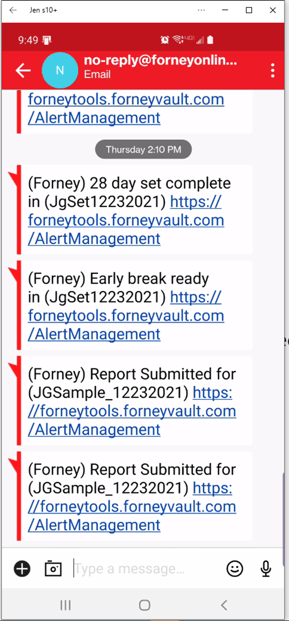
Notification Sample Email from ForneyTools
Notification Sample SMS Text from ForneyTools