How do I manage Recipients and Distribution Groups in ForneyTools?
With ForneyTools, distribution groups allow you to easily share sample reports or, via Alerts, be notified of all aspects of your test data.
Table of Contents
3. Create a Distribution Group
4. Manage a Distribution Group
Create Recipients
- Select Recipient Directory from Reports or Recipient Directory from Alerts under the Main Navigation menu.


- Select the +Create Recipient button to add a new record.

- To add and internal User select Forney Username of the user you wish to add as a recipient.

- To add and internal User select Forney Username of the user you wish to add as a recipient.
- Enter the User's Display Name, Email where reports or alerts will be delivered, Mobile Number, mobile SMS carrier, and Country.
Note: You can add an email address, a mobile number, or both. This choice determines whether the recipient receives email notifications, SMS notifications, or both. - Select the Update button to save your record.
- New recipients are set to "Active" by default.
- Recipient entries cannot be deleted, but they can be marked as inactive.
Add an External Recipient
- To add an External User, check the External radio button and complete the required fields: Name and Email of the new recipient.

- Select the Update button to save your record.
- New recipients are set to "Active" by default.
- Recipient entries cannot be deleted, but they can be marked as inactive.
Create a Distribution Group
- Select Distribution Groups from Reports or Distribution Groups from Alerts under the Main Navigation menu.


- Select the Create Group button at the top of the Alerts Management page to add a new group.

- A new row will appear in the group list with a default "New Group" name in the name field.
- Select the name field to assign a unique name to your new group.

- Select the Save (
 ) button to store your new record.
Manage a Distribution Group
Add a Member to a Distribution Group
- Select the Add Member button of the Distribution Group the User needs to be added.

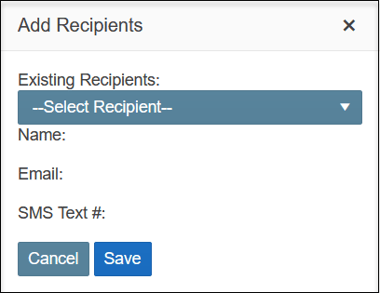
- Select the User's recipient record using the Add Recipients window.

- Select the Save button to record the changes.
Remove a User from a Distribution Group
- Select + button to expand the desired distribution group's members' view.

- Select the Remove (
 )button to remove that specific recipient from the group.